“How do I paint and stain my new, unfinished furniture?”
It’s a popular question here at Peaceful Valley Furniture — one that we’re more than happy to answer….and even show you with this tutorial.
We spoke to AJ, an employee and craftsmen, here at our Intercourse Store and created this guide for painting and staining your unfinished furniture.
Supplies:
- Sponge or paint brush
- Drop cloth or blanket (to protect the ground)
- Sandpaper at 150 grit or an Electric Sander
- Extension cord, if needed
- Paint — we chose Easy Care and customized our white to “dolphin gray”
- Painter’s tape
- Stain —we used Minwax in Dark Walnut
- Sealer — we used Zar’s Fast Drying Polyurethane
- Fan (to speed up the drying)
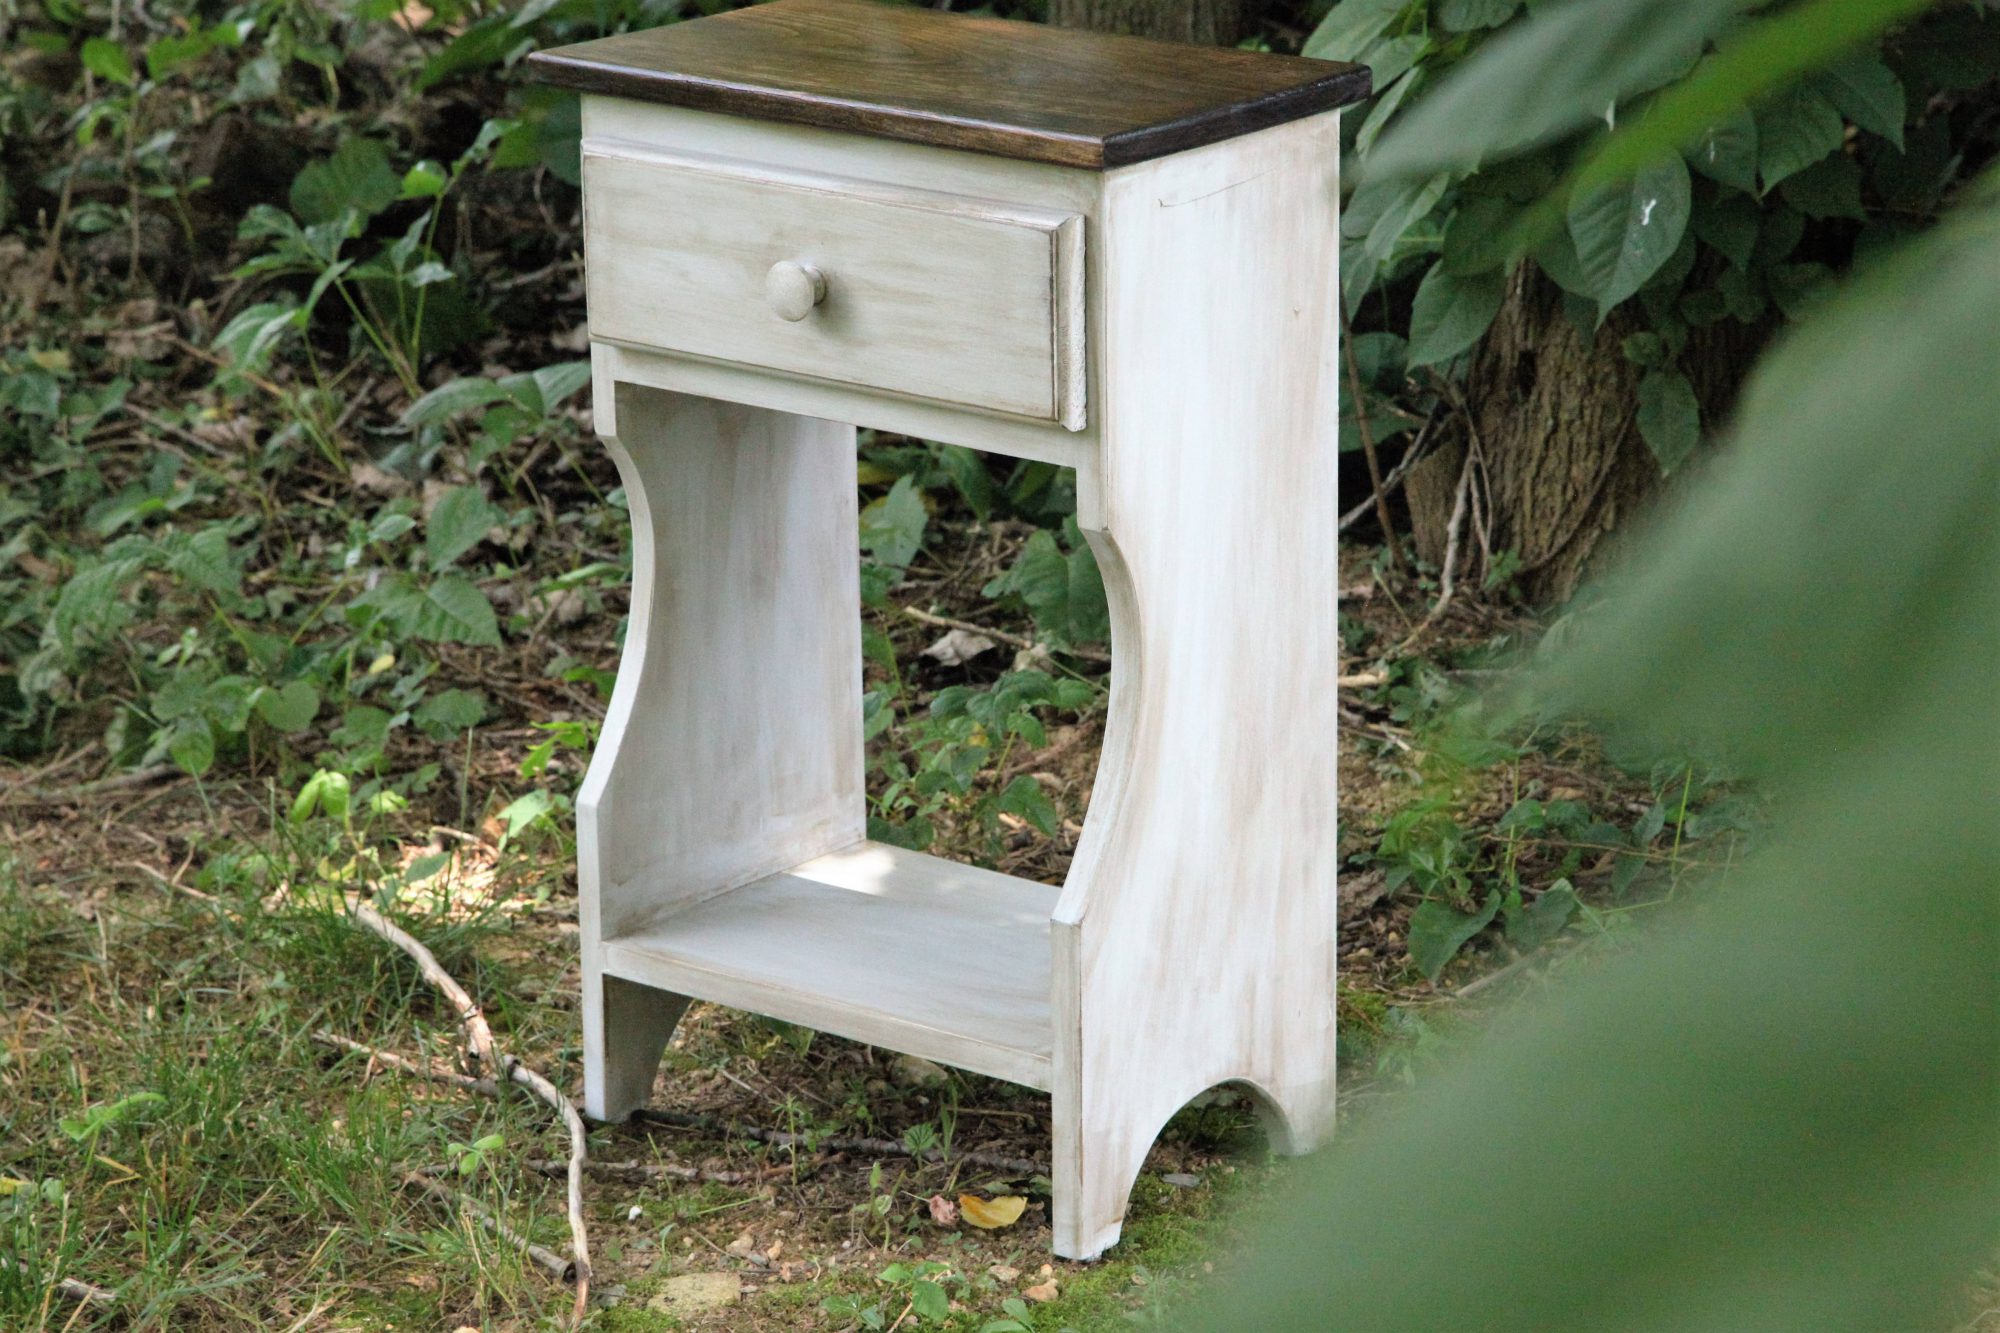
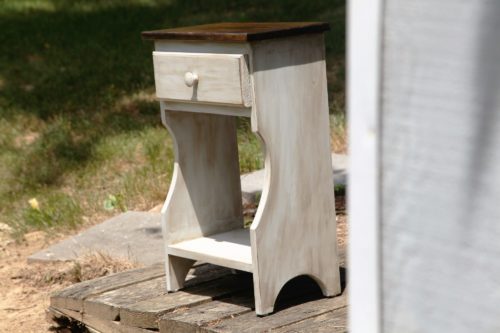
- Unfinished furniture— we chose our Small Night Stand One Drawer

Let’s get creative!
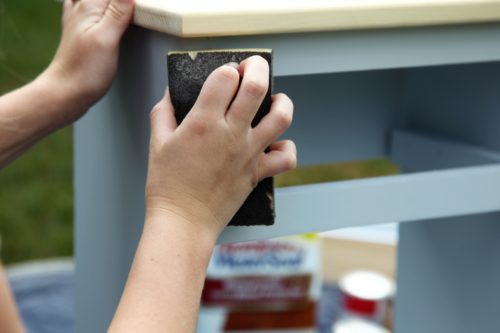
Step 1: Sand
Smooth your unfinished piece from top to bottom, light and gentle, with an Electric Sander or sandpaper of 150 grit. All of our unfinished furniture has been sanded by our employees at our shop so it may only require a small amount of sanding, just a touch up here or there.

You don’t need to sand too much for the piece to become smooth and ready for paint.
Tip: Make sure you sand the furniture evenly. If you don’t maintain an even pressure, the stain may not look exactly the same everywhere. The harder you sand, the lighter the stain may get. Simply spend the same amount of time and pressure on each section of your furniture.
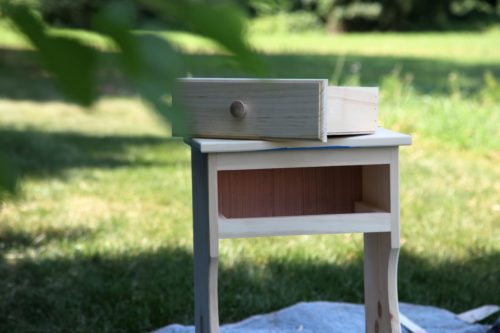
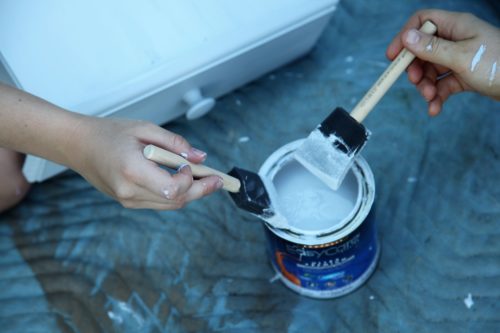
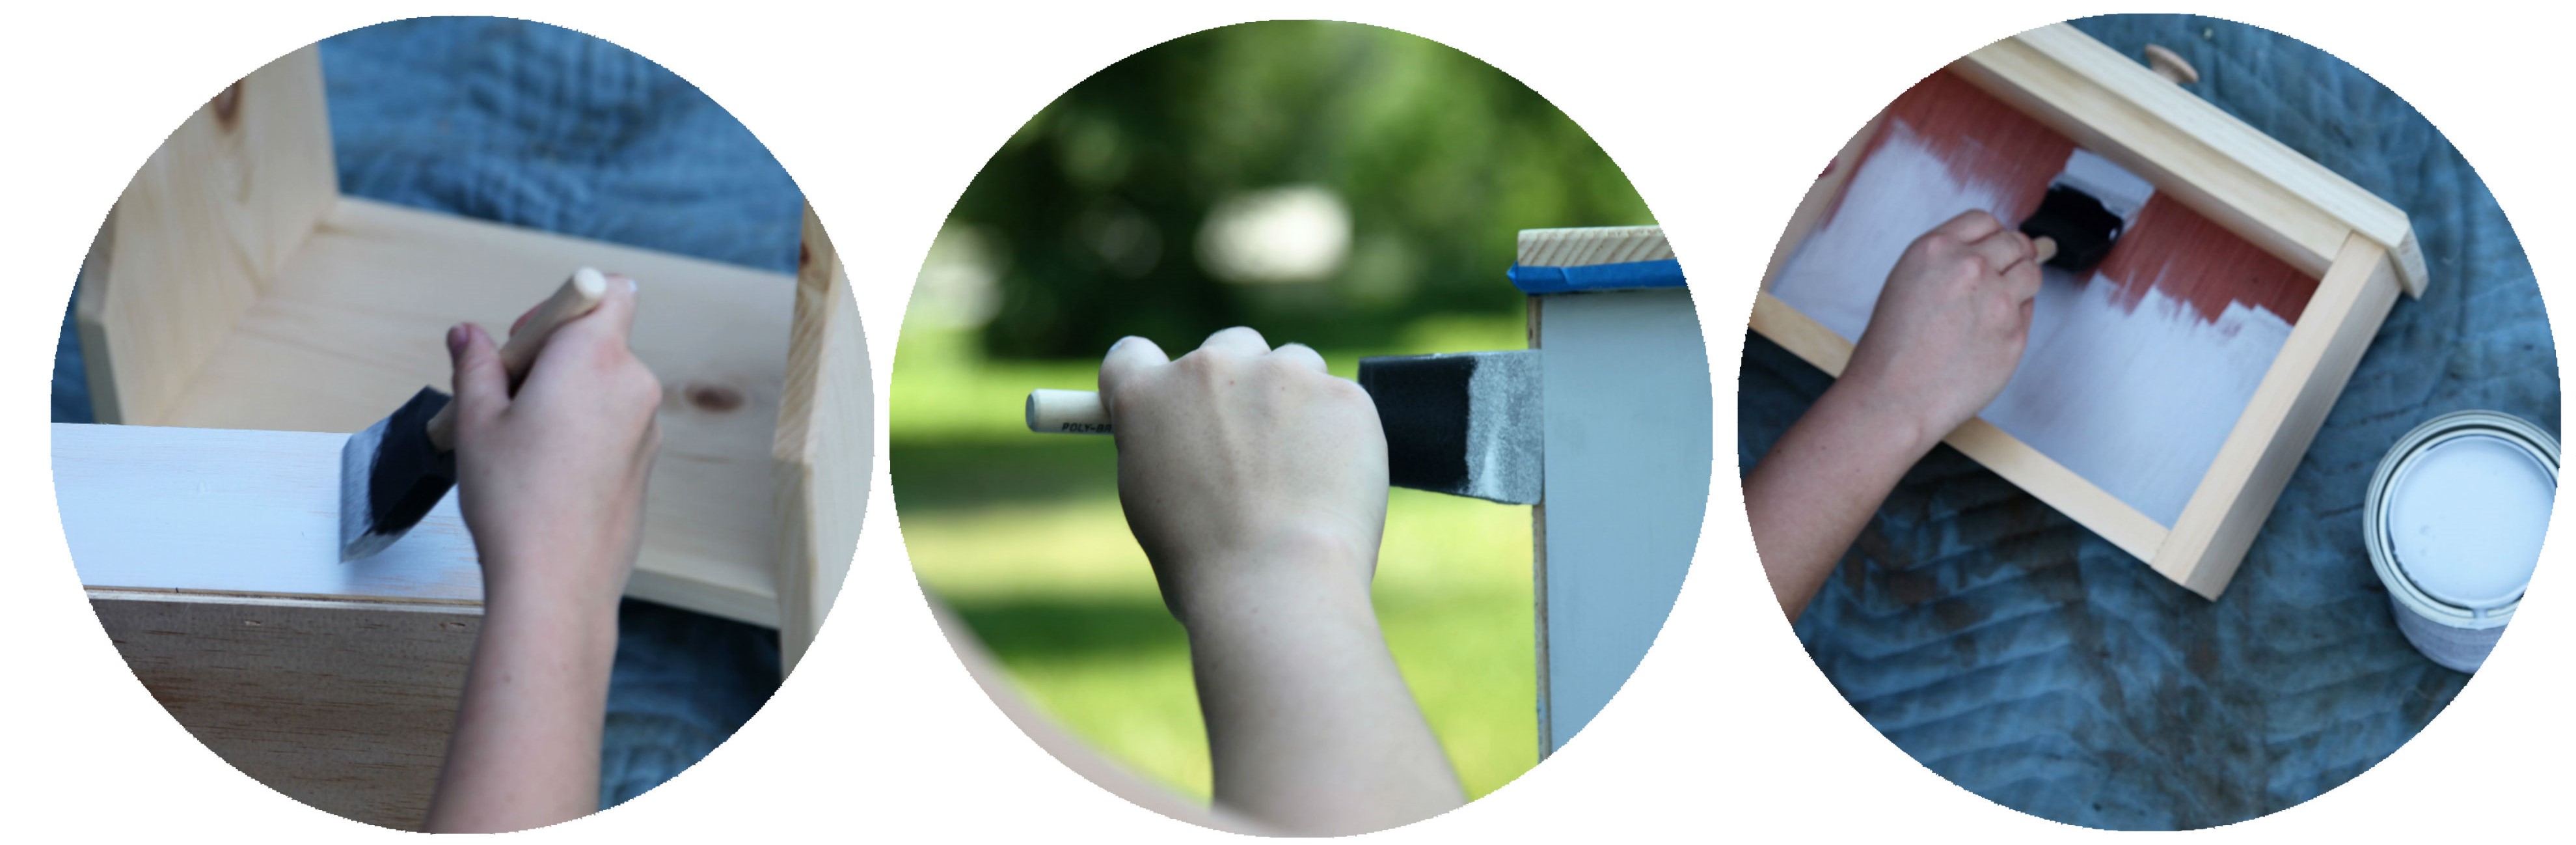
Step 2: Paint
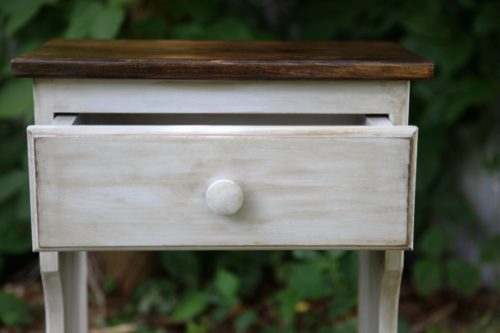
First, you need to decide what part of the furniture you want painted and what part you want stained. We chose to paint and glaze the bottom half of our nightstand while staining the top, for a timeless, classic style.
After you’ve identified where you want to paint, begin!

Wherever you don’t want to painted, section off with painter’s tape to prevent any smudges. Dip your brush into the container for a small portion of paint and apply with consistency.
Tip: Don’t paint in direct sunlight because your paint and stain may dry too fast or bubble.
Depending on the paint, you may need more than one coat. Let it dry and see if the first coat is too light or streaky. Paint a second coat if necessary.
Remember to remove the tape as soon as you’re done painting so there won’t be any sticky pieces left over. Let your furniture dry according to the paint’s directions.
Tip: If you’re using a brush, be mindful of streaks created by the bristles. Invest in a good quality one for the best outcome. Also, keep in mind that sponge brushes may absorb the paint quickly so you won’t need to soak it too long.
Step 3. Sand…again!
Polish your piece with the sand paper everywhere you painted, with gentle amount of pressure.
As you may have guessed, sanding is an important step to ensuring your furniture absorbs the material properly. Sanding your furniture smooths the surface so that the next coat will hold well.
Tip: If you want a distressed look, sand your edges — and anywhere you would like distressed — through to the unfinished wood.
The paint may make your furniture rough again so this second sanding will help smooth it out. Don’t forget to sand evenly for a final look that’s even and consistent.
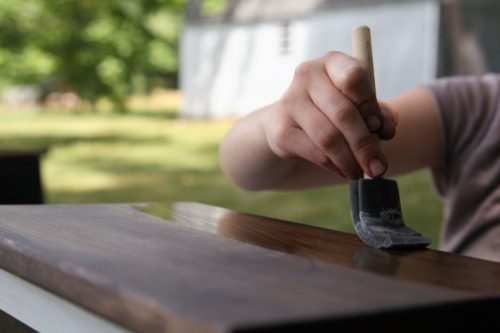
Step 4: Stain
Stain your piece from top to bottom using your sponge brush for an clean application.

It’s important to stain all over the painted section because the stain may tint the painted section slightly and you don’t want the piece to look uneven or mismatched. The stain doesn’t make the surface of your furniture rough like paint or sealer does.
Because we used a dark stain on a light paint, we rubbed the stain into the paint with a paper towel, creating a primitive glazed style. If you want a two-tone look, we recommend a lighter stain or darker paint.
Don’t forget to let the piece dry completely. Follow the stain’s directions on how much time is necessary.
Step 5: Seal
Apply a healthy coat of sealer to your furniture, brushing in steady motions.
The stain will have made the surface of your piece smooth and level. This final step will finish the look of your handcrafted furniture, making every surface smooth and flawless.

Tip: Though we didn’t apply lacquer to our Nightstand, we do recommend using one if you want water-proof furniture. Work fast and apply the lacquer evenly in a moderate-temperature room.
Don’t apply lacquer instead of sealer…because without sealer, the last coat of lacquer would become rough and uneven — not exactly what you want your finished masterpiece to look like!
Step 7: Enjoy your finished masterpiece!
Now that the hard work is complete, you can sit back and relax, cherishing your newest addition to your home.

Every time you look at your furniture, you’ll smile, knowing you had an integral part in creating such a beautiful treasure.
Need printed instructions? Download the tutorial on How to Paint & Stain Your Unfinished Furniture.
*Some directions may vary depending on the brand or product. Check the instructions on the paints and stains before starting. Our Amish builders use a different kind of paint and stain than this tutorial because they finish a large quantity of furniture at their workshops.
Thanx for the great tips & also for the excellent unfinished furniture. Over the years we have purchased many pieces from various shops in the Lancaster area & we love them all. Blessings to all.
Thanks for the comment, Mike! We’re thrilled to provide quality unfinished furniture! It’s a lot of fun to put your own personal touch onto your new furniture with a special paint or stain.
Hopefully this tutorial will come in handy for your next project!