Warm weather is the perfect time to break out your outdoor furniture for some good old relaxing in the sunshine. Our Pressure Treated Pine outdoor furniture promises both a high-quality structure and meticulous craftsmanship, guaranteeing a comfy haven in nature.
But as with everything in life, maintaining your Pressure Treated Pine furniture is important…and fortunately, very doable.
|| Follow these five simple steps for better, more durable outdoor furniture!

Staining your outdoor pressure treated pine furniture will help ensure that the harsh elements of winter snow and summer sun doesn’t damage or crack your outdoor furniture. We recommend staining every other year, if not yearly, depending where you have your furniture outside (i.e. in the shade) and how harsh of weather conditions.
The best time to stain? As soon as you bring your pressure treated pine furniture home to prevent any unwanted, possible cracks. Seasonally speaking, spring and summertime work best for staining because the furniture will dry faster.
 Supplies:
- Hose and washcloths, if needed
- Sand paper or machine sander
- Sponge brushes
- Stain— we used Thompson’s WaterSeal in Rustic Red
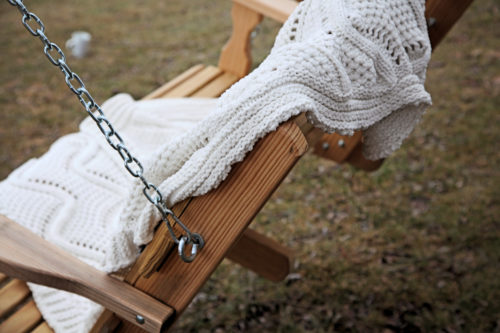
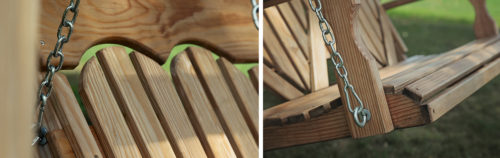
- Pressure Treated Pine Furniture — we used our High Back Heart Porch Swing
Tip: We recommend using a water-based stain which will thoroughly protect your furniture from the elements.
Step 1: Wash
Start by washing your furniture down with some lukewarm water. Scrub away any stubborn marks or messes with a rag. If your furniture has been in the elements for a while, they might need a good bath from a pressure washer.

Tip: Use extreme caution when using a pressure washer less you damage your furniture. Only use one if your furniture desperately needs it!
It’s important to get your furniture as clean as possible so that the sealer adsorbs well.
Step 2: Dry
Let your furniture dry for several hours, overnight if you can. The longer it dries, the better the sealer will work!
You can test the dryness of your Pressure Treated Pine piece by splashing a few droplets of water on it. If the water absorbs into the wood, it’s dry enough and ready to go! If it remains beaded on the surface, let it dry longer.
 Step 3: Sand
Once it’s dry, sand away any rough layers of wood to create a smooth, clean surface to seal. You can use a pieces of sanding paper and sand by hand or a sanding machine for a quicker step.
Tip: If your furniture isn’t too rough or scratched, you can skip with step with no worries. Sanding helps smooth the surface to prepare for the stain; if your piece is smooth already, you’re good to go!
 Step 4: Stain
Dust away any pieces leftover from the sanding and begin staining! We left our pressure treated pine swing hanging up so we could stain the top first. After that, we set it on the ground, flipped the swing over, and stained the bottom.
Have fun choosing a color to liven up your backyard but don’t worry if the color looks a bit different than expected, especially at the very beginning. At first, when we opened our stain, we thought we would be painting our swing a pretty light pink. Luckily, it spread on thin with a rosy glow.

Embrace creativity and enjoy the wide variety of colors to chose from. If you decide to stay with the original wood shade, Thompson’s WaterSeal even offers an transparent stain.
Tip: Don’t paint in the sun or your furniture‘s new stain might blister because of the intense heat and UV rays. We recommend painting in the shade.
 Dip your sponge brush into the container and gently brush the first coat on. If you’re using a fast-drying sealer, make sure you work fast enough that your furniture doesn’t look patchy. A sponge brush absorbs the stain quickly so it doesn’t need much time soaking in the sealer.
Tip: Paint with the grain for a complete, smoother finish!
It may seem intimidating at first, especially if it’s your first time staining, but don’t worry about mistakes too much! Enjoy the fun process of creating a masterpiece for your home! Any flaw or mistake will be a reminder of this creative memory.
Step 5: Dry… Again!
This step is fairly easy; all you need to do is wait and let your pressure treated pine furniture dry. Your masterpiece will be ready to enjoy in several hours.

Congratulations, your diy project is complete! Time to breathe a sigh of relief.
If you’re into a little less maintenance, a little more ease, our Poly Lumber outdoor furniture boasts a durable construction, long-lasting quality, and splinter-free composition. You can find a whole variety of Poly outdoor furniture perfect for summertime on our website or at our Intercourse location.
|| Download the printable instructions: Tutorial- Staining Pressure Treated Pine ||
Ahh, the sun is out, shining bright and guess what? Your outdoor furniture is gleaming, ready for some sunshine too! Now you can enjoy every season with the ease of knowing your Pressure Treated Pine furniture is ready to weather any and all of the elements. And you’re the reason why!